
Chris van Meer is a HashiCorp Ambassador.
HashiCorp Boundary is a tool that simplifies and secures remote access to systems and applications. It gives administrators fine-grained access control without the need to manage complex network configurations or expose sensitive credentials. It also streamlines the process of granting and revoking access, making it easier for organizations to protect their critical infrastructure.
Boundary differs from traditional solutions in this space, such as jump-boxes, bastion hosts, or VPNs, because it does not need any ingress firewall (NAT) rules or a bastion host (which also exposes the destination host). Instead, it needs only egress access to an upstream worker.
This post shows how to set up Boundary from scratch and configure a complete remote access workflow that even someone with no Boundary knowledge whatsoever can use.
Boundary is available in three editions:
- Community edition: Free and source-available
- Boundary Enterprise: The self-managed, on-premises commercial version with enterprise features
- HCP Boundary: A SaaS version of Boundary available on the HashiCorp Cloud Platform (HCP)
This post uses HCP Boundary in order to get up and running faster than the on-premises versions. The tutorial uses code from the hcp-boundary-demo GitHub repository to provision Boundary and some Microsoft Azure infrastructure for the demo using HashiCorp Terraform.
»How Boundary works
Boundary allows traffic to flow to private subnets without actually having to open up ingress traffic on the private subnet. Boundary’s traffic flows are even more flexible in Boundary Enterprise and HCP Boundary, where you can use a process called multi-hop sessions with self-managed workers. Put simply, after setting up these features, HCP Boundary will redirect your connection to a public ingress worker while the egress worker connects back to that ingress worker with only outbound traffic needed.
In a sense, this follows the security principles of smart-home devices. For instance, you wouldn’t need to set up a personal firewall to access Philips Hue smart lights from outside of your home or to access your P1 smart energy meter from across the country.
»Setting the stage
This diagram of the final system’s architecture shows how it works:
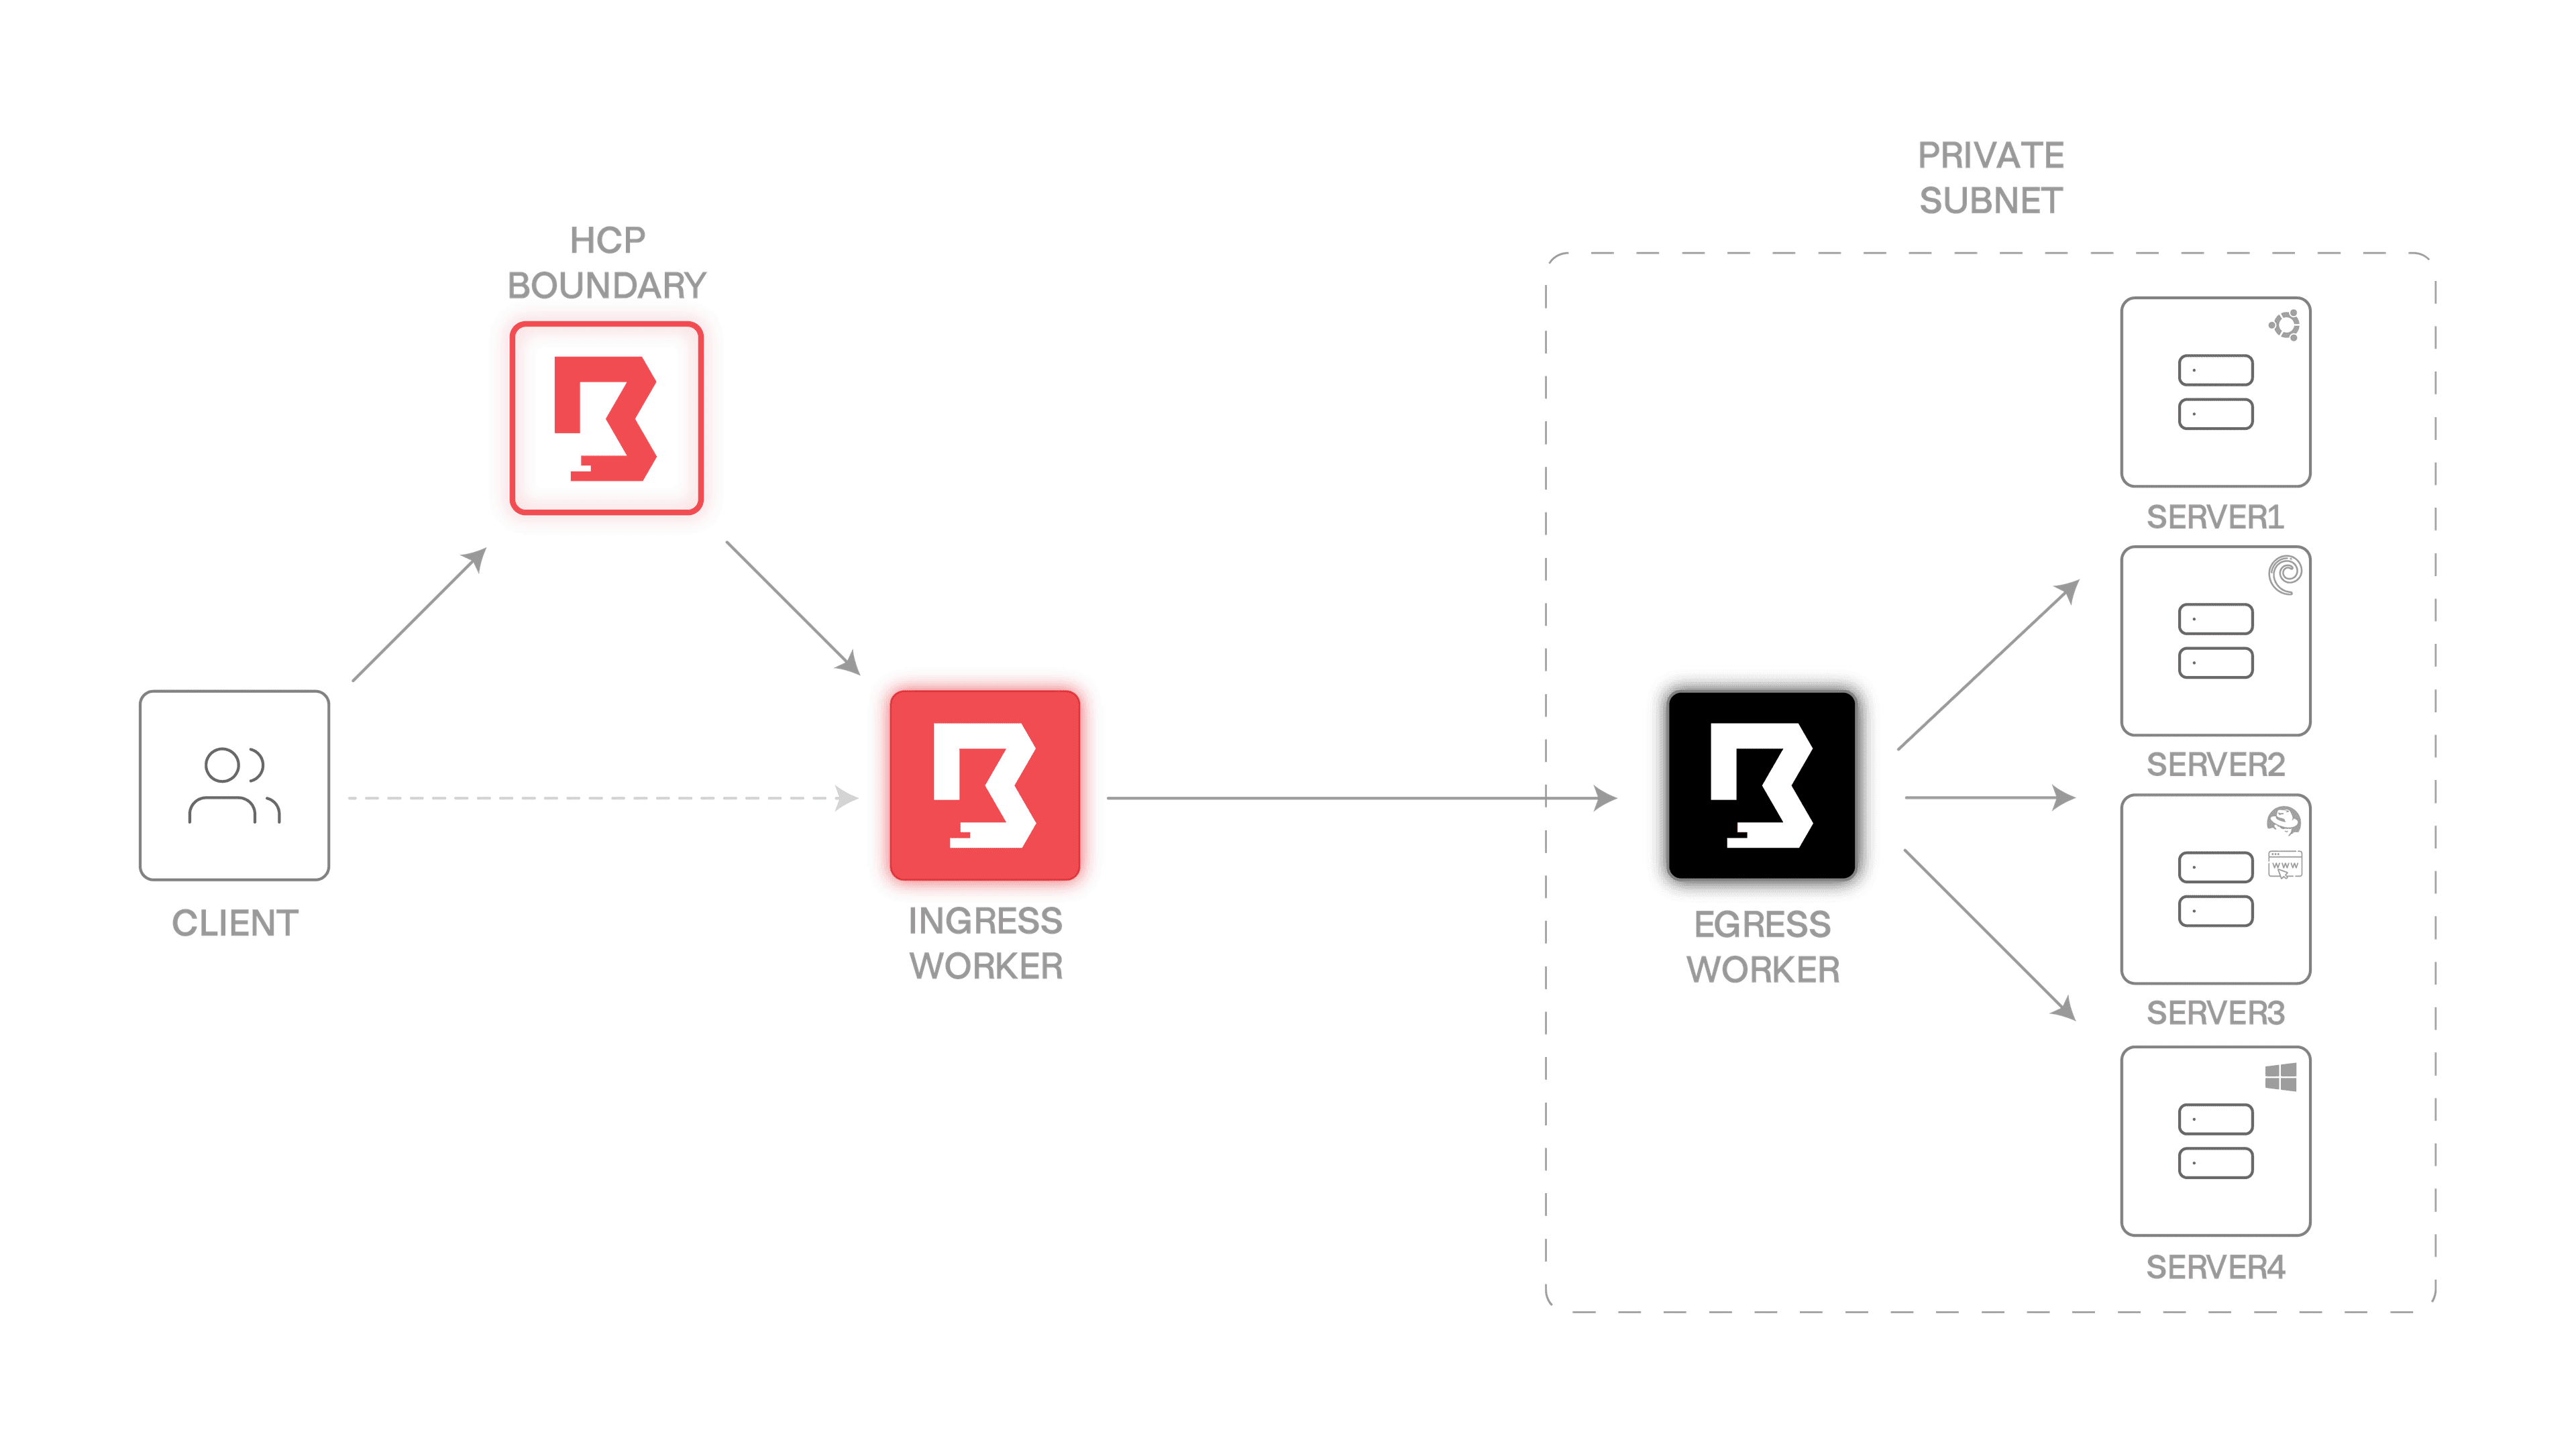
The system includes:
- HCP Boundary
- Two worker VMs, one dealing with ingress traffic, the other egress only (labeled “ingress worker” and “egress worker”)
- Four server VMs, three of them Linux (a different Linux distribution for each one denoted by the corner logos) and one of them Windows
Note that both the egress worker and the server VMs are not publicly accessible (that means no ingress traffic is possible). They are allowed to receive traffic only within the same private subnet and to emit egress traffic to the internet. This is a key security layer of Boundary that traditional access methods (VPNs, jump-boxes, and bastion hosts) don’t support.
Also note that this tutorial uses only server1 as an SSH target, but feel free to experiment with HTTP (server3 has a web server installed) and RDP on server4 as well as host sets.
This tutorial uses the HCP Boundary UI for most tasks. This makes it easier to understand the steps, since a CLI tutorial would require memorizing a lot of IDs along the way.
»Create an HCP Boundary cluster
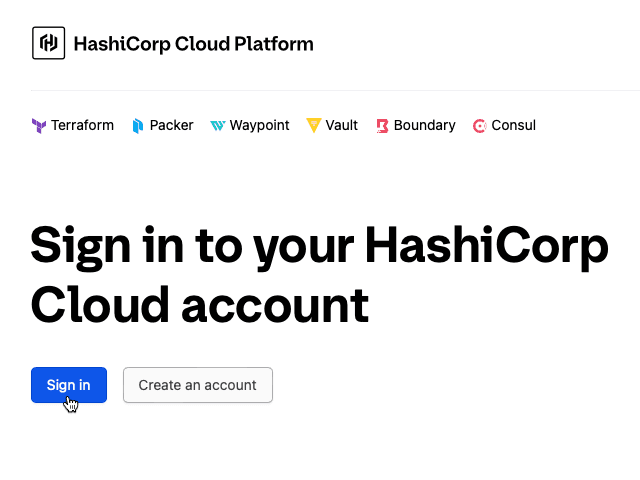
To create an HCP Boundary cluster, navigate to the HCP Portal and log in.
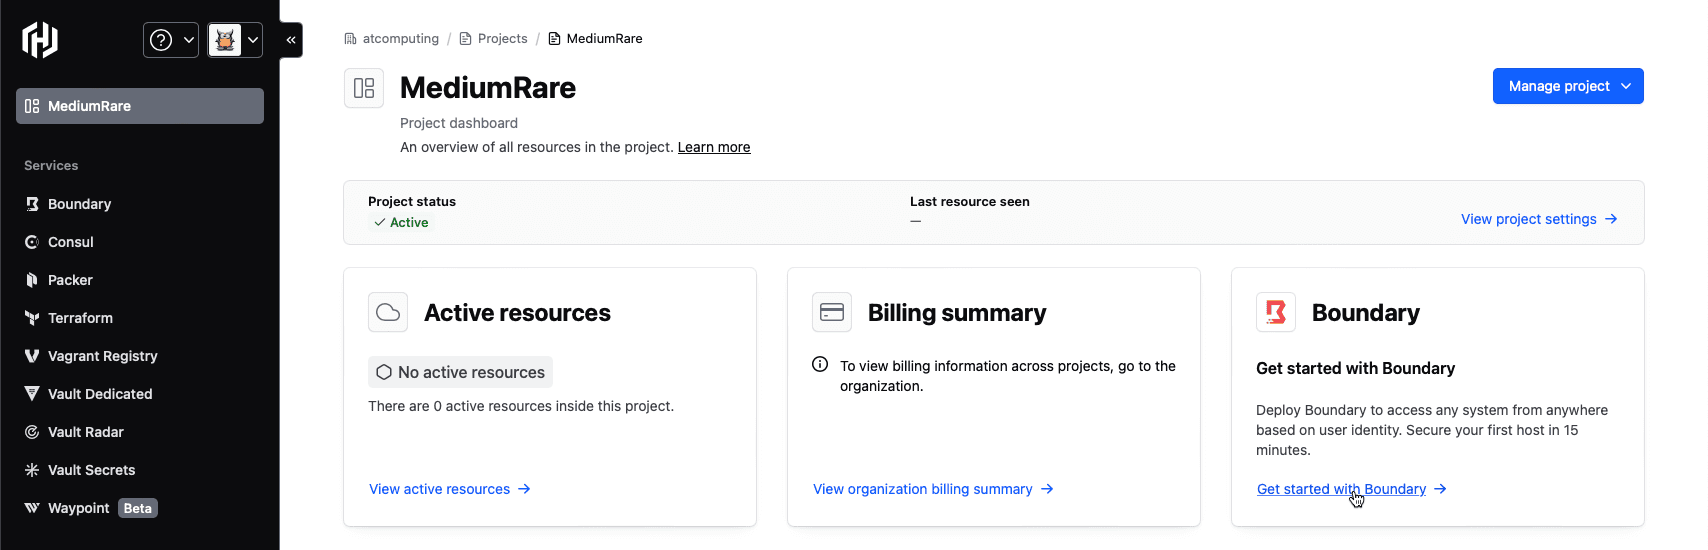
If you have not yet created an account, do so now. During this process you will be asked to create an organization. Within that organization you can create multiple projects. In the example screenshot below, the project is called MediumRare. Whatever you name your project, select that project from the dropdown menu, then click on the “Get started with Boundary” link shown in the image:
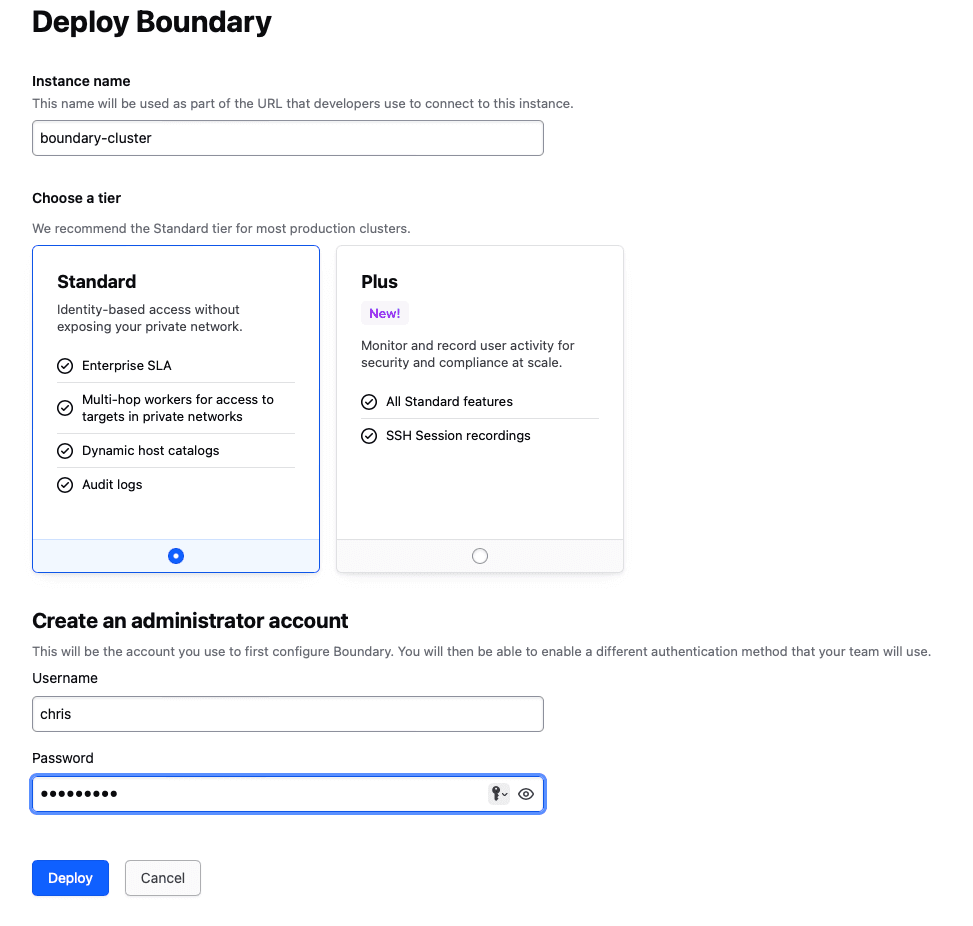
From there, click on “Deploy Boundary”.
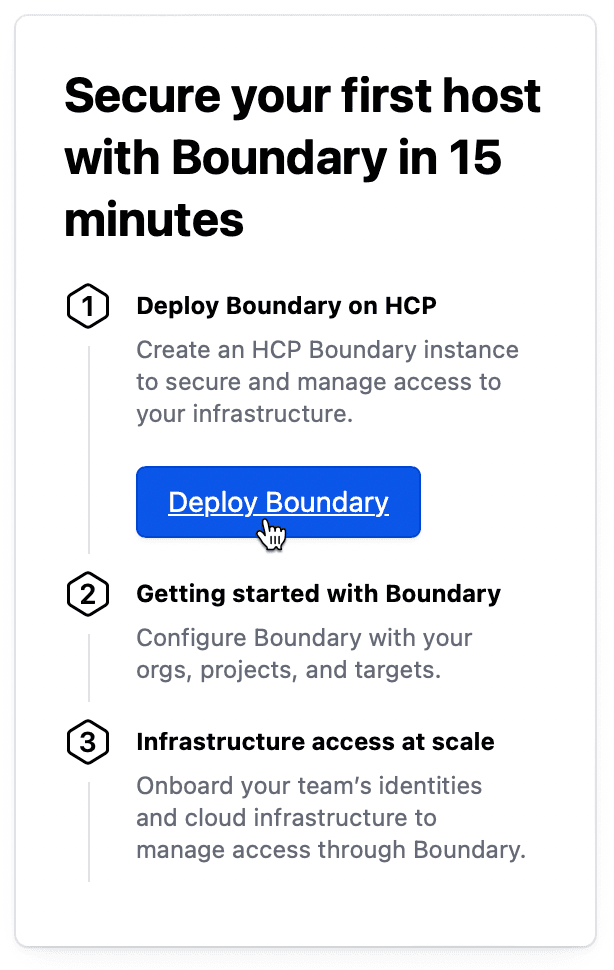
Then select the standard tier and supply a username and password for the main administrator account. After that, click “Deploy” and you will have a Boundary cluster within minutes.
After a short wait, you should see a green checkmark next to the status. From there you can continue and click on “Open Admin UI”. Fill in the administrator credentials and proceed to “Sign In”. On the screen that asks if you have a target to test, click “Do this later”.
That’s it for now. You will return to Boundary through the HCP Boundary control plane (also called the Boundary UI) when you need to set up workers and your environment.
»Deploy the infrastructure with Terraform
After the Boundary cluster is created, you can deploy the demo infrastructure from the GitHub repository hcp-boundary-demo. Run these commands:
terraform init
terraform plan
terraform apply
After a few minutes, Terraform will deploy your infrastructure within Microsoft Azure. When the run is completed successfully, the system will return information to will help you set up your environment for Boundary:
(..)
Apply complete! Resources: 28 added, 0 changed, 0 destroyed.

Outputs:

vm-server01 = "serveradmin@100.0.1.6"
vm-server02 = "serveradmin@100.0.1.4"
vm-server03 = "serveradmin@100.0.1.8"
vm-server04 = "serveradmin@100.0.1.5"
vm-server04-password = <sensitive>
vm-worker-egress = "boundary@100.0.1.7"
vm-worker-ingress = "boundary@20.8.112.156"
Remember that from these deployed VMs, only the ingress worker will be accessible through a public IP address shown in the Terraform output.
Note: All of the IP addresses, tokens, and URLs in this demo have been destroyed before publishing this post
»Install the self-managed workers
Connections within Boundary are processed by workers. By default, you get two HCP managed workers deployed with your Boundary cluster. But for this exercise, you’ll use your own installed workers to set up the connections to your private subnet.
»Configure the ingress worker
Log into the newly installed ingress worker via SSH:
❯ ssh boundary@20.8.112.156
The authenticity of host '20.8.112.156 (20.8.112.156)' can't be established.
ED25519 key fingerprint is SHA256:73T5ofwyLDEzyQB0jvsSOsXz6sd4jwG8dACO8nUo6hQ.
This key is not known by any other names.
Are you sure you want to continue connecting (yes/no/[fingerprint])? yes
Warning: Permanently added '20.8.112.156' (ED25519) to the list of known hosts.
Welcome to Ubuntu 22.04.4 LTS (GNU/Linux 6.5.0-1021-azure x86_64)

* Documentation:  https://help.ubuntu.com
* Management:     https://landscape.canonical.com
* Support:        https://ubuntu.com/pro

System information as of Tue Jun 11 09:28:09 UTC 2024

 System load:  0.12              Processes:             103
 Usage of /:   5.1% of 28.89GB   Users logged in:       0
 Memory usage: 30%               IPv4 address for eth0: 10.0.1.4
 Swap usage:   0%


Expanded Security Maintenance for Applications is not enabled.

0 updates can be applied immediately.

Enable ESM Apps to receive additional future security updates.
See https://ubuntu.com/esm or run: sudo pro status


The list of available updates is more than a week old.
To check for new updates run: sudo apt update

Last login: Tue Jun 11 09:28:11 2024 from 84.26.105.192
To run a command as administrator (user "root"), use "sudo <command>".
See "man sudo_root" for details.

boundary@vm-worker-ingress:~$
Next, install the boundary-enterprise package. This installs the Boundary binary capable of connecting to HCP Boundary and Boundary Enterprise.
❯ wget -O- https://apt.releases.hashicorp.com/gpg | gpg --dearmor | sudo tee /usr/share/keyrings/hashicorp-archive-keyring.gpg >/dev/null
❯ echo "deb [signed-by=/usr/share/keyrings/hashicorp-archive-keyring.gpg] https://apt.releases.hashicorp.com $(lsb_release -cs) main" | sudo tee /etc/apt/sources.list.d/hashicorp.list
❯ sudo apt update && sudo apt install -y boundary-enterprise
The next step involves creating a configuration file for the ingress worker. For this, you need two pieces of information:
- Your HCP Boundary cluster ID
- The public IP address of your ingress worker
For the HCP Boundary cluster ID, navigate to the HCP Boundary control plane. In the left pane, choose “Workers” and then in the right pane click on “New”.
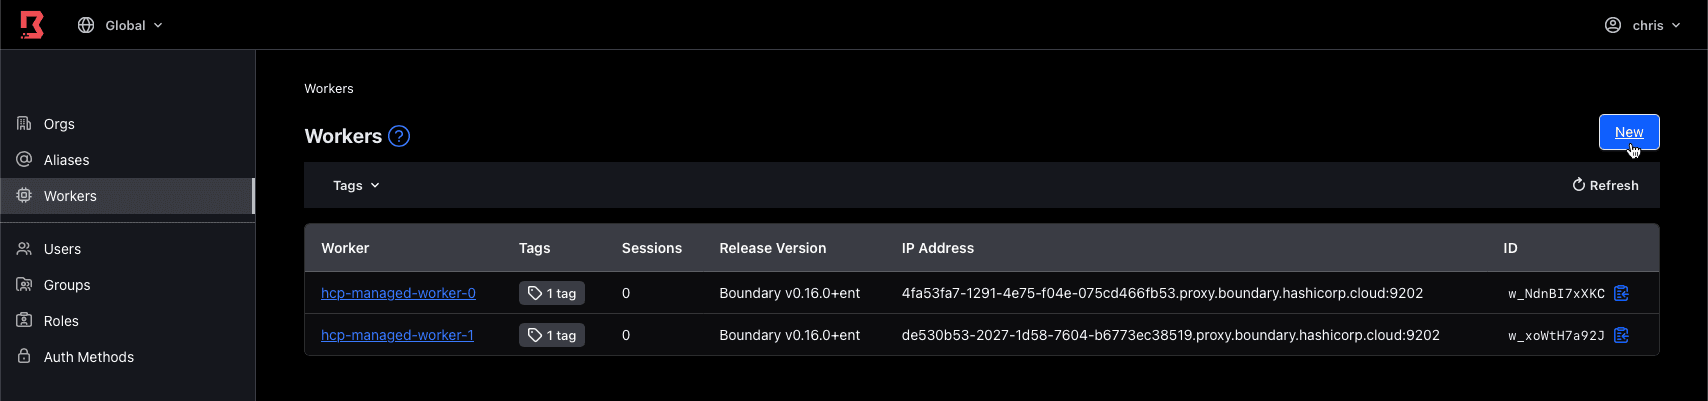
In the form, you will be greeted with your Boundary cluster ID. Copy this into a text editor and leave the “New PKI Worker” in the background.
The ingress worker has a public IP address and is available from the HCP Boundary control plane. For the public IP address of your ingress worker, you can either exit out of your SSH connection and repeat your last command and copy the IP address from that, or go back to the Terraform directory and issue a terraform output and copy the public IP address from there.
Now, with the cluster ID and IP address, you can create an ingress worker configuration. Use the command below to load the configuration from the demo repository:
❯ sudo tee /etc/boundary.d/ingress-worker.hcl > /dev/null << EOF
disable_mlock           = true
hcp_boundary_cluster_id = "6a0ca1ac-8c75-47eb-8819-cc180d949f7e"

listener "tcp" {
 address = "0.0.0.0:9202"
 purpose = "proxy"
}

worker {
 public_addr        = "20.8.112.156"
 auth_storage_path = "/opt/boundary/ingress-worker"
 tags {
   type = ["ingress"]
 }
}
EOF
Next, create a systemd unit file to make sure that the worker is started automatically in the background:
❯ sudo tee /usr/lib/systemd/system/boundary-worker.service > /dev/null << EOF
[Unit]
Description=Boundary Worker Service
Wants=network-online.target
After=network-online.target

[Service]
User=boundary
Group=boundary
Type=simple
ExecStart=/usr/bin/boundary server -config="/etc/boundary.d/ingress-worker.hcl"

[Install]
WantedBy=multi-user.target
EOF

❯ sudo systemctl daemon-reload
❯ sudo systemctl enable --now boundary-worker
Created symlink /etc/systemd/system/multi-user.target.wants/boundary-worker.service → /lib/systemd/system/boundary-worker.service.
Check the output of the service to get another critical piece of information, the “Worker Auth Registration Request”.
❯ journalctl -u boundary-worker | head -n 10
vm-worker-ingress systemd[1]: Started Boundary Worker Service.
vm-worker-ingress boundary[3201]: ==> Boundary server configuration:
vm-worker-ingress boundary[3201]:                                Cgo: disabled
vm-worker-ingress boundary[3201]:                         Listener 1: tcp (addr: "0.0.0.0:9202", max_request_duration: "1m30s", purpose: "proxy")
vm-worker-ingress boundary[3201]:                          Log Level: info
vm-worker-ingress boundary[3201]:                              Mlock: supported: true, enabled: false
vm-worker-ingress boundary[3201]:                            Version: Boundary v0.16.1+ent
vm-worker-ingress boundary[3201]:                        Version Sha: bcf9720aabbe27a5bced2fff22c1469fd156e433
vm-worker-ingress boundary[3201]:         Worker Auth Current Key Id: justness-rule-snuggle-monthly-swipe-mooned-vanity-calzone
vm-worker-ingress boundary[3201]:   Worker Auth Registration Request: GzusqckarbczHoLGQ4UA25uSQrUxChDeeEbizy5XUx8g1gskPaTrsFUCKwT1nWYoEygfqyWwmHeKhPLDdoFRvmxYuFRFPtKWP6MbCoJdnB2FCFCwQ7EPeC5wN4zKGwZ1yeqbj3Y5i2zQ2onBdrhexPmiK5Ws7zBB76gCwKTxXZrCfCBHU4KinsmzvAZyTQJjWyAncC8T75uSLPB2HvQbg6Lx5SCYzoFsKipJQfso2ZczGzgz91jsMhdqxJQ6HztweszJHyJhMdi9LcKBacQqnN6VwHX4waSKW5Jqk7ETGo
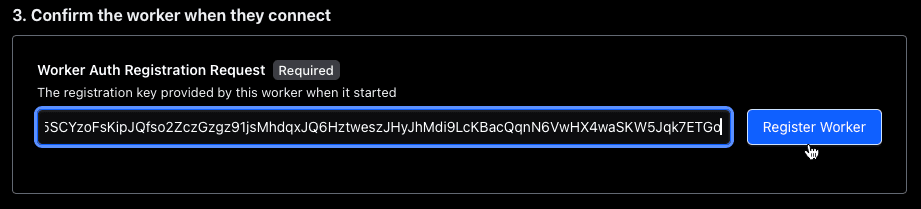
Copy the Worker Auth Current Key Id: token, head back to the Boundary UI, and in the “New PKI Worker” screen, scroll all the way down and paste that token into the field called “Worker Auth Registration Request” and then click “Register Worker”.
You should receive a “Registered successfully” message. After that, click on “Done”. Navigate back to the Workers overview page where you can see the new worker. Click on the blue underlined link to go to the new worker.
It’s easier to remember what each worker is used for if you give them informative names. So on that page for the new worker, click on the button called “Edit Form” at the bottom and give this worker the name “worker-ingress” and then click “Save”.
And with that, you’ve configured the ingress worker. You can safely log out of the SSH session connected to the ingress worker, since you won’t need that anymore.
»Configuring the egress worker
The process for the egress worker is similar: Install the package, create a configuration, create a systemd unit file, and then enable and start the service. However, since this egress worker is accessible only within the private subnet, you have to configure it through the Azure serial console.
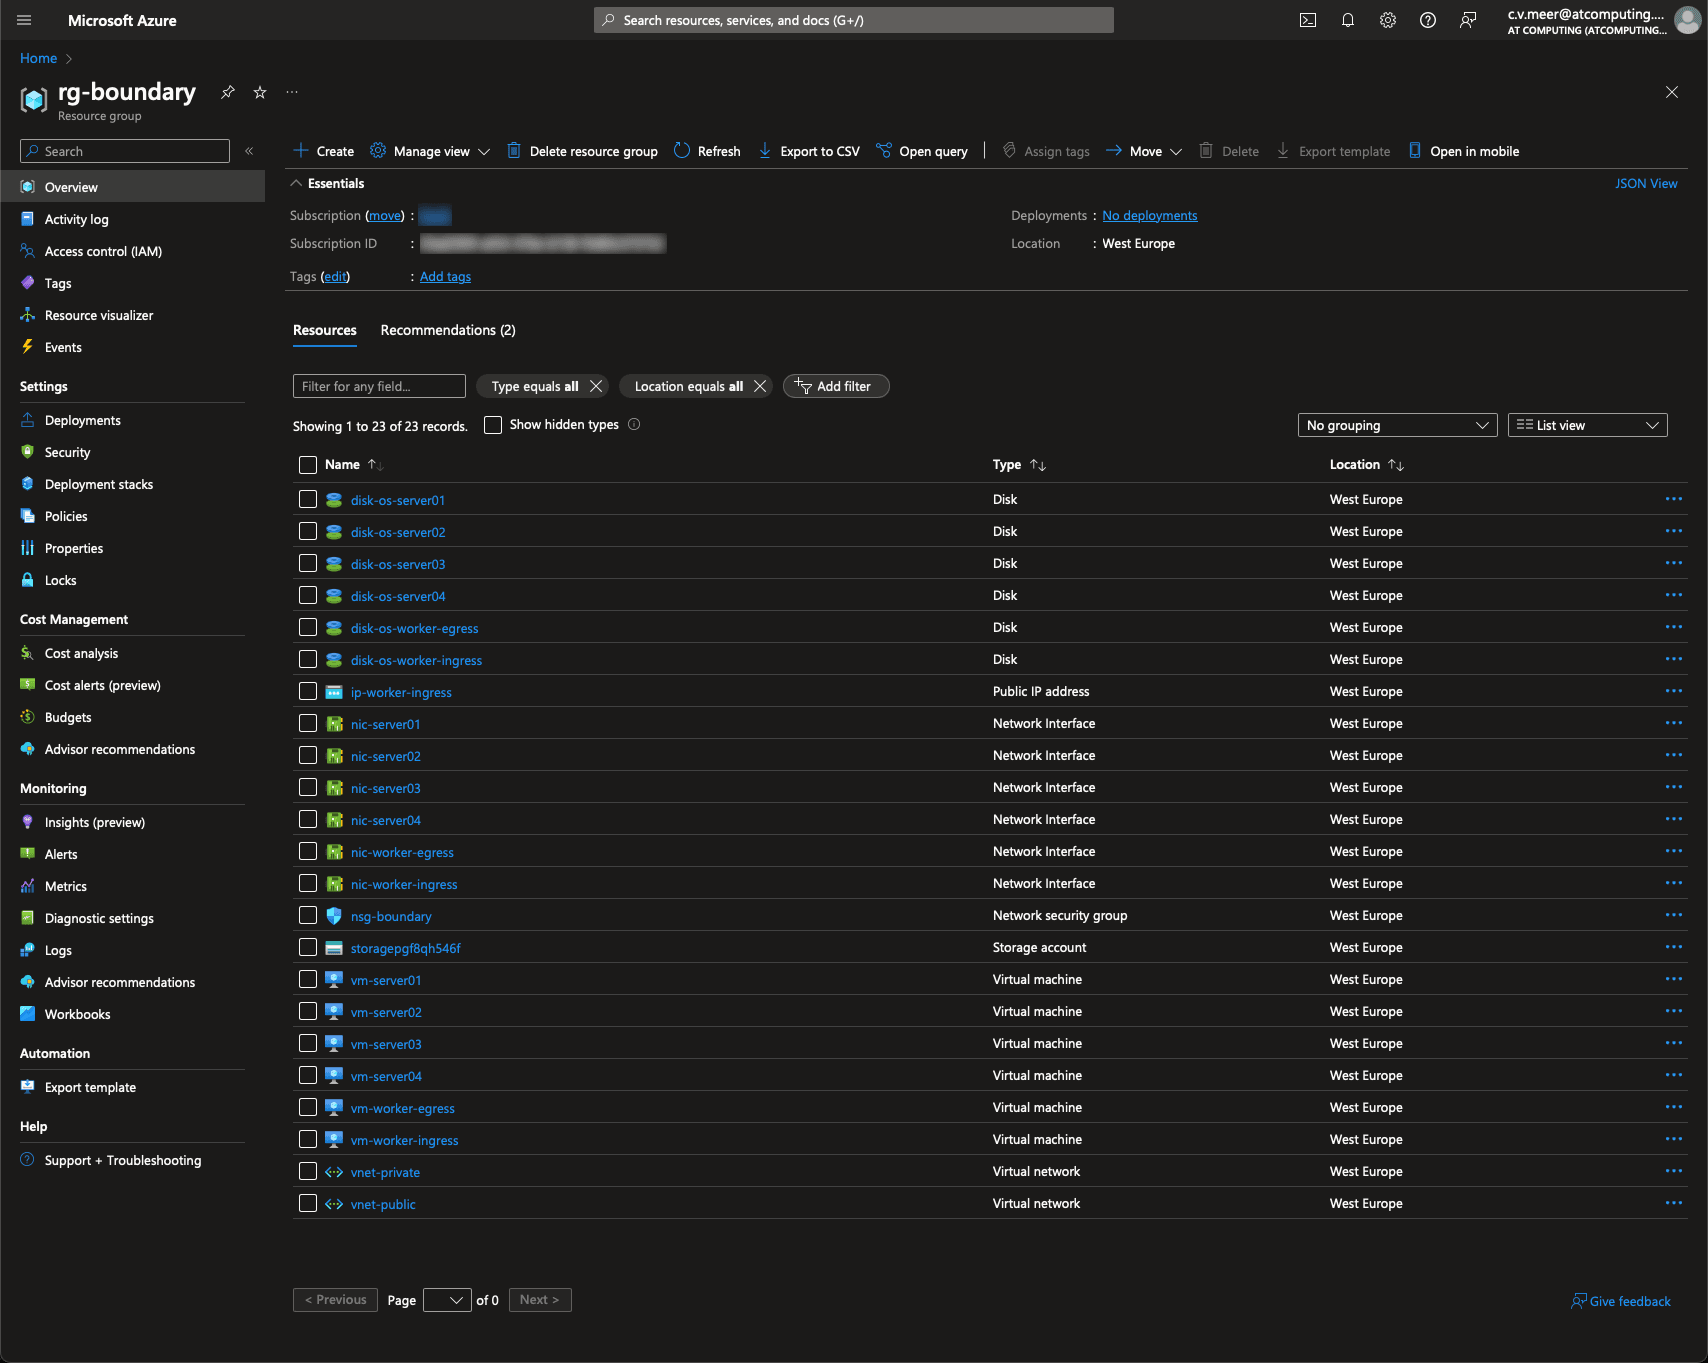
Log into your Azure portal, navigate to your resource group (by default it’s called rg-boundary), and you will get an overview of the created resources:
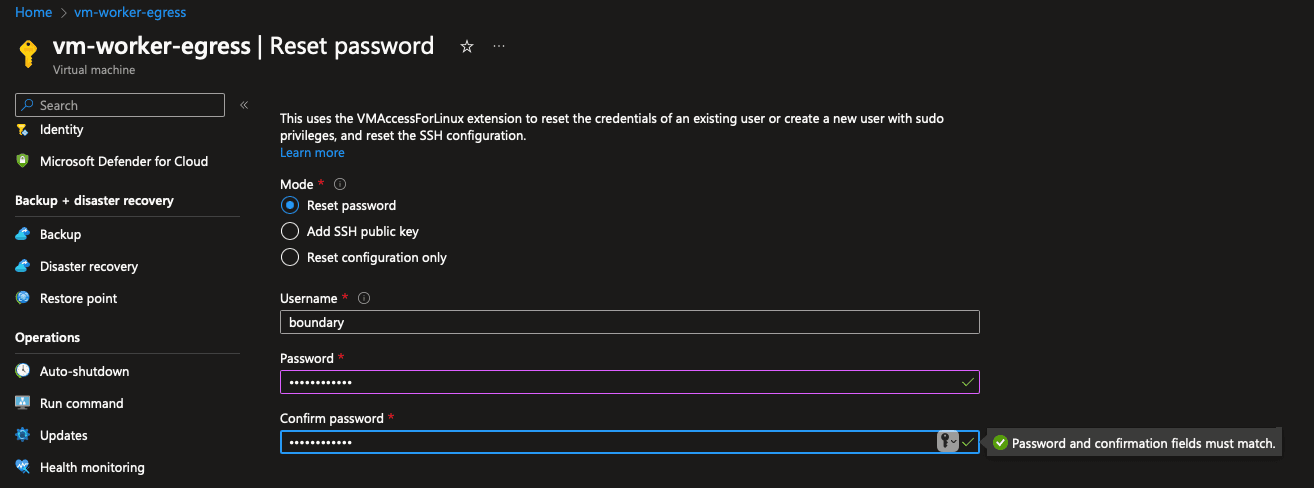
Navigate to the “vm-worker-egress” resource and, in the left pane, scroll all the way down to “Reset password”. For ease of use, choose the “Reset password” mode. Keep the username boundary and choose a new password for this user. Then hit the “Update” button:
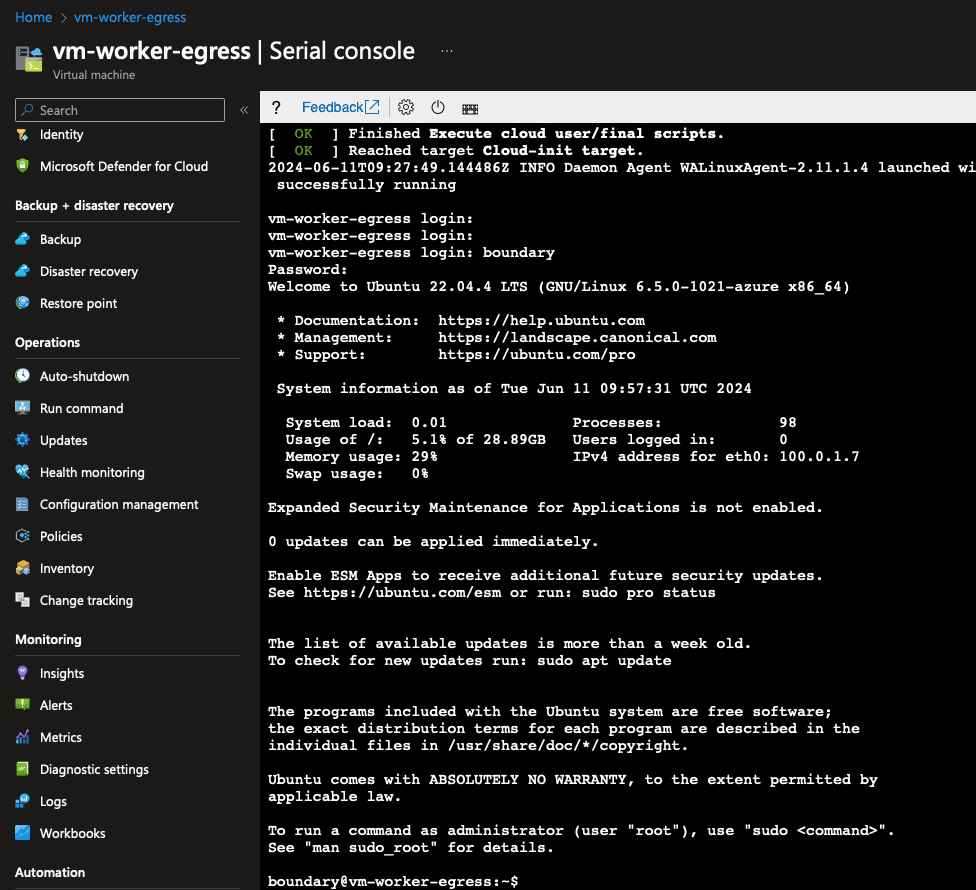
It will take a couple of seconds for Azure to reset the password for the user. Once that is done, in the left pane scroll down until you see “Serial console”. Click on that and you will be greeted with a terminal.
You will see a lot of information about started services and some SSH keys. Hit Enter a few times to get a clear prompt and then log in with the username boundary and the password you just created in the previous step:
In that terminal, first type in sudo -i. Then type in the password you created. Your prompt will now say root@vm-worker-egress. Type exit and hit Enter. The reason for this is because the commands that you will be applying to this console will use privileged access through sudo, but in the Azure serial console you will not see a password prompt during the installation tasks. Those steps will get ahead of this potential issue.
After that, follow the same process as setting up the ingress worker, though the configuration is slightly different and you need only one piece of information: the public IP address of the ingress worker.
First, install the package by pasting this code into the Azure serial console:
❯ wget -O- https://apt.releases.hashicorp.com/gpg | gpg --dearmor | sudo tee /usr/share/keyrings/hashicorp-archive-keyring.gpg >/dev/null
❯ echo "deb [signed-by=/usr/share/keyrings/hashicorp-archive-keyring.gpg] https://apt.releases.hashicorp.com $(lsb_release -cs) main" | sudo tee /etc/apt/sources.list.d/hashicorp.list
❯ sudo apt update && sudo apt install -y boundary-enterprise
Your console will probably overlap after this — hit Ctrl+L to clear the console screen.
After that, create the egress worker configuration:
❯ sudo tee /etc/boundary.d/egress-worker.hcl > /dev/null << EOF
disable_mlock = true

listener "tcp" {
 address = "0.0.0.0:9203"
 purpose = "proxy"
}

worker {
 initial_upstreams = ["20.8.112.156:9202"]
 auth_storage_path = "/opt/boundary/egress-worker"
 tags {
   type = ["egress"]
 }
}
EOF
Then create the service and start it. If you copied the command from the ingress worker, be sure to change the config file reference.
❯ sudo tee /usr/lib/systemd/system/boundary-worker.service > /dev/null << EOF
[Unit]
Description=Boundary Worker Service
Wants=network-online.target
After=network-online.target

[Service]
User=boundary
Group=boundary
Type=simple
ExecStart=/usr/bin/boundary server -config="/etc/boundary.d/egress-worker.hcl"

[Install]
WantedBy=multi-user.target
EOF

❯ sudo systemctl daemon-reload
❯ sudo systemctl enable --now boundary-worker
Just like with the ingress controller, grab the worker auth registration request token and copy that onto your clipboard:
❯ journalctl -u boundary-worker | head -n 10
vm-worker-egress systemd[1]: Started Boundary Worker Service.
vm-worker-egress boundary[2437]: ==> Boundary server configuration:
vm-worker-egress boundary[2437]:                                Cgo: disabled
vm-worker-egress boundary[2437]:                         Listener 1: tcp (addr: "0.0.0.0:9203", max_request_duration: "1m30s", purpose: "proxy")
vm-worker-egress boundary[2437]:                          Log Level: info
vm-worker-egress boundary[2437]:                              Mlock: supported: true, enabled: false
vm-worker-egress boundary[2437]:                            Version: Boundary v0.16.1+ent
vm-worker-egress boundary[2437]:                        Version Sha: bcf9720aabbe27a5bced2fff22c1469fd156e433
vm-worker-egress boundary[2437]:         Worker Auth Current Key Id: diabetic-concise-turbine-daylight-colossal-cornball-petal-wanting
vm-worker-egress boundary[2437]:   Worker Auth Registration Request: GzusqckarbczHoLGQ4UA25uSRQ9rDpjzx6UT4UunSzcmbeqmsKgNTtMsNA2HNZ35fiZr2UPq9SVzeLdNRaepuCDR6KsAuA6UmGpu2ot1GNizeHarSDcb959kna9kWBgHsgcBigiTAY454194n3JJkzZpwHdAJHdK7XBAi3FfuaYRCxtBACEhb6u9r4EZrN5cwBQojDptpNoKK1DmavYXrG5PMemmdS83EA5tV4uD1gN6omdqNF7ZkZVdp49WmmToUYVtz9GhhS6kZtspV5zTQzb9K3KDLSTf8ztZ3HwMgk
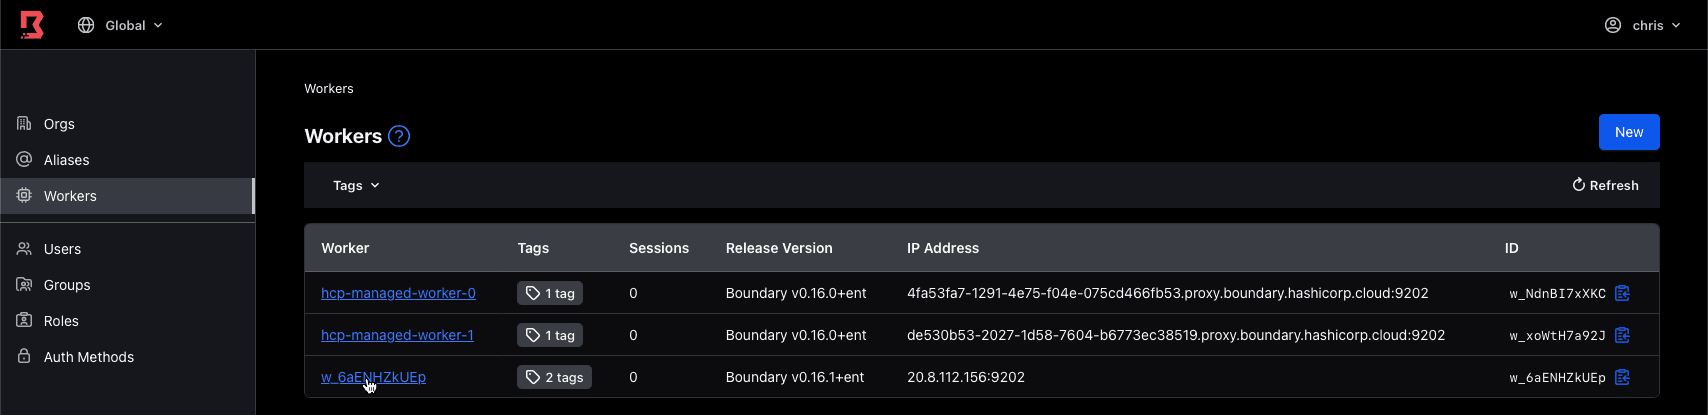
With this copied, go back to the Boundary UI again to register the egress worker. Just like the last time, click on “Workers”, then “New”, scroll all the way down, and paste this registration request into the input field and click on “Register Worker”. Once this is done and you get a successfully added message, click on “Done” and exit out of the Azure serial console (make a habit of logging out of the console first). Rename the egress worker like you did with the ingress worker.
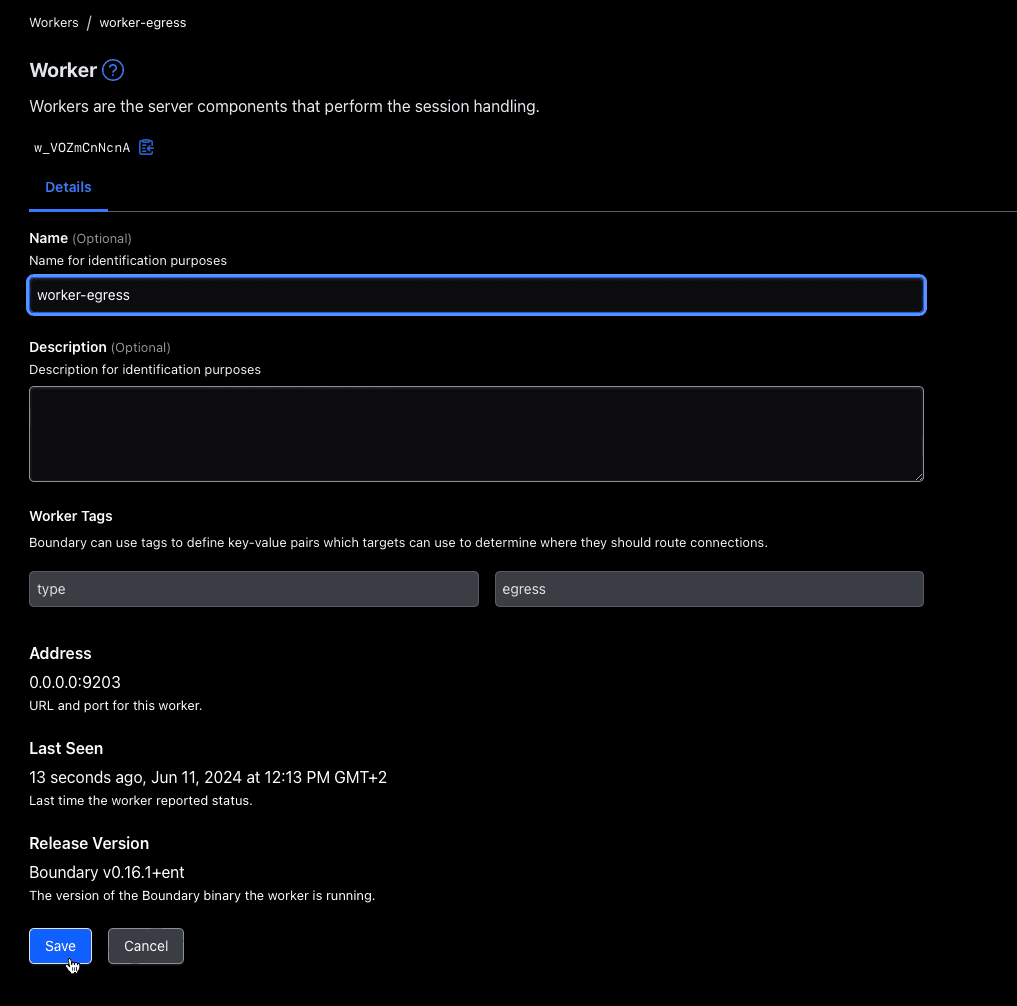
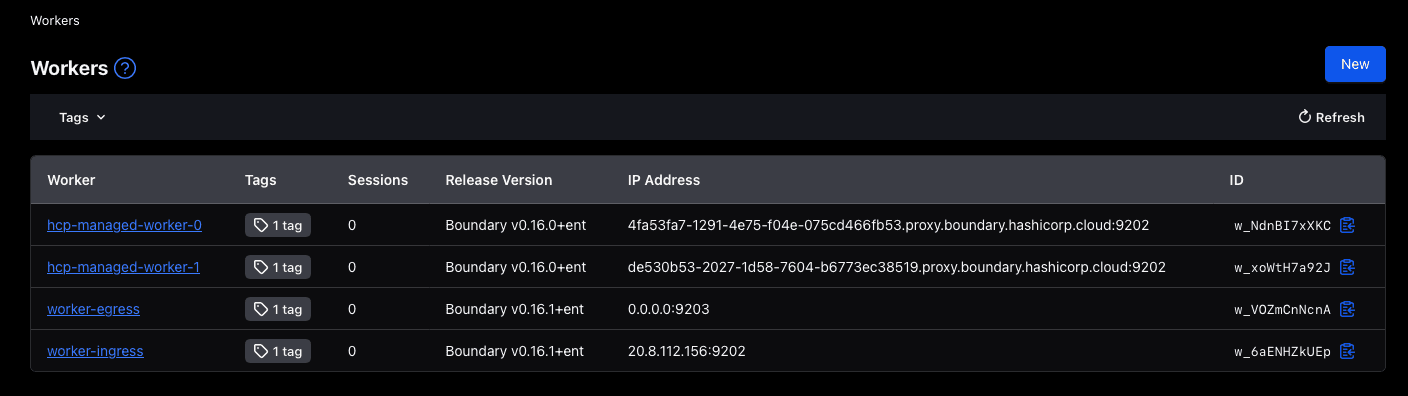
You see that even though the egress worker is not publicly accessible, HCP Boundary can still communicate with the worker. Both workers are now set up:
»Create a target configuration
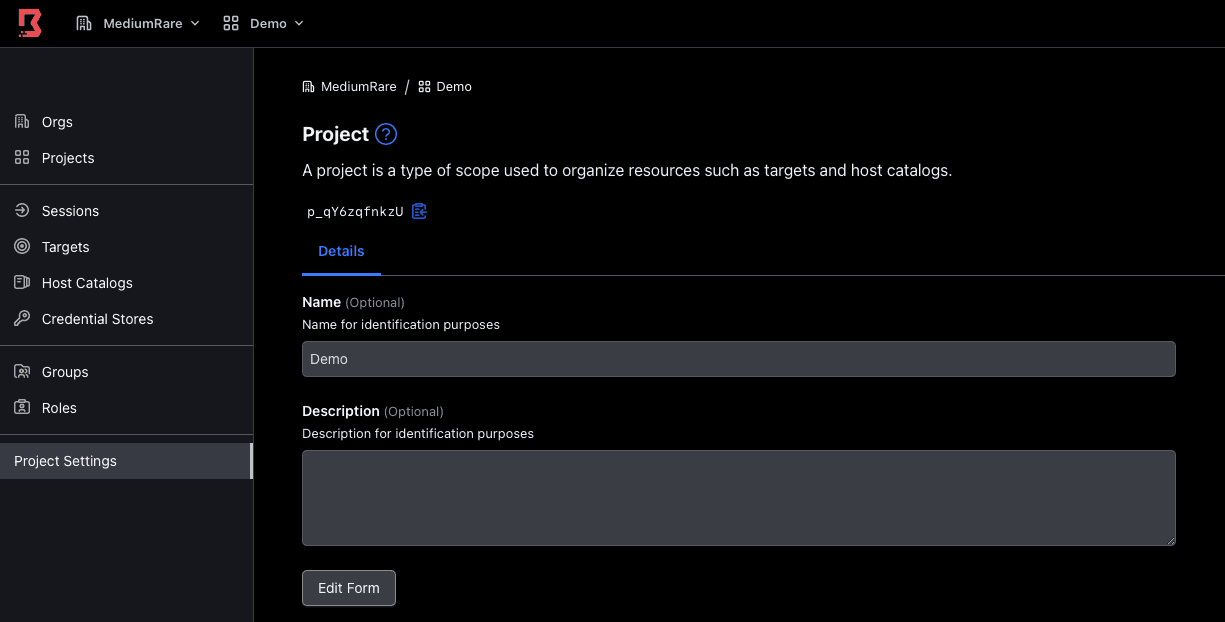
The next step is to configure HCP Boundary with your desired target configuration. But first, you have to create an Org and a Project.
On the left pane, click on “Orgs” and then click on “New”. Fill in a name and click on “Save”. After that, you will see a button appear on the left pane called “Projects”. Click on this and from there click on “New”, fill out a name and “Save”. In this demo, the Org is named “MediumRare” and the project is named “Demo”. You will end up with something like this.
Your targets will be the server VMs in the private subnet. The first task for setting up these targets is to generate credentials. The whole idea of HCP Boundary is separating the users from the backend credentials. Users should be able to authenticate to Boundary, and then Boundary can take care of the backend connection.
Ideally, your production Boundary setup will use HashiCorp Vault with credential injection from a KV store, or use Vault’s SSH secrets engine. Vault offers many different secrets engines that provide dynamic credentials , which is significantly more secure and scalable, but to keep this demo simple the next section uses static credentials generated by Terraform during the deployment.
On the left pane, click on “Credential Stores”. From there, click on “New”, name it “Static credential store” with the type of “Static” and click “Save”. In the next screen, click on the “Credentials” tab and click “New”:
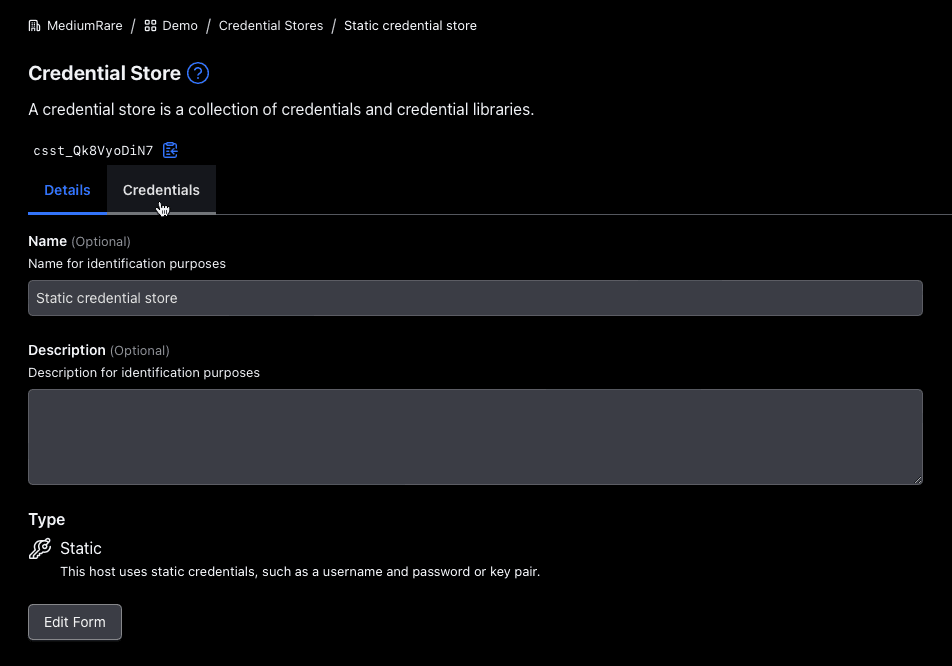
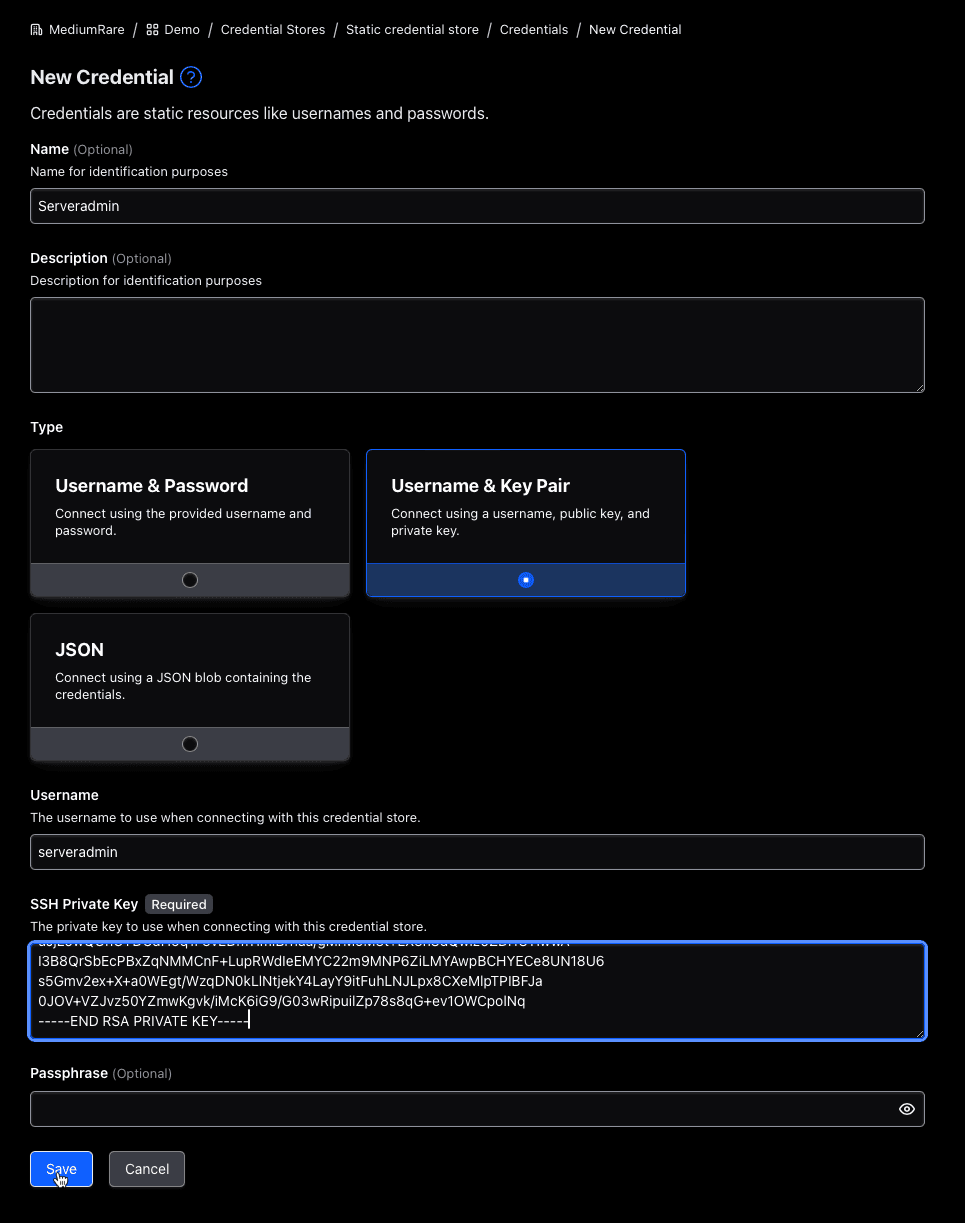
Name this credential “Serveradmin” and choose “Username & Key Pair” as its type. As soon as you click on that, you then can enter the relevant credentials.
In the Terraform directory you used to deploy the infrastructure, there resides a servers.pem file. Copy the contents of that file into the “SSH Private Key” field and make sure that the “Username” field says serveradmin. Leave the passphrase empty and click on “Save”:
Now you can create your target configuration. Click on “Targets” in the left pane and then click “New”. Name it server1, select “SSH” as type, and for the “Target Address” go to the Terraform directory and issue a terraform output once more for the private IP address of server1. In this case, it should be 100.0.1.6.
That is the basic idea. Now comes the intricate bit. If you scroll down to the “Workers” section, you will see the ability to toggle an ingress worker filter and/or an egress worker filter.
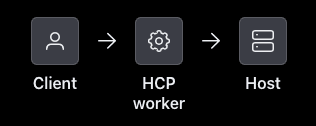
Above those toggle switches you will see a representation of the connection flow. If neither of the worker filters are toggled, it would use an “HCP worker” to connect to your “Host” (target).
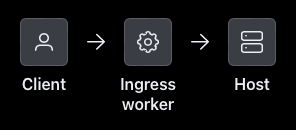
That is not what you want here, because this tutorial uses self-managed workers. So start by toggling the “Ingress worker filter”. You will see the image change to use an “Ingress worker” to connect to the “Host”:
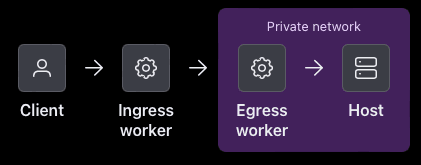
Your ingress worker cannot access the host because it is not publicly accessible, but an egress worker is. So toggle the “Egress worker filter” and see how the image has changed:
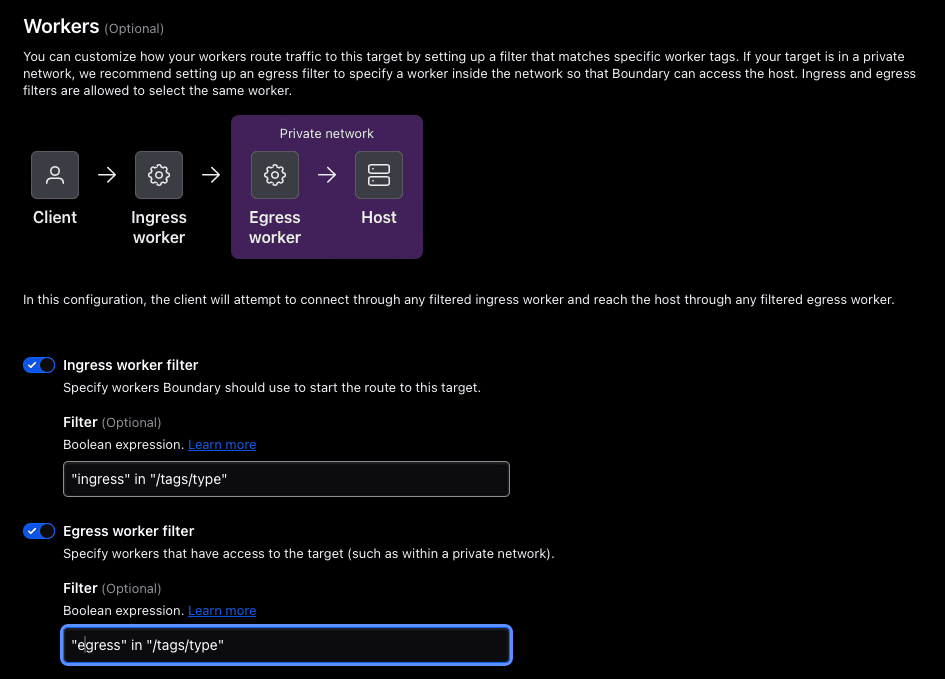
The last step is to tell Boundary to use the specific workers you installed. Look back at the worker configuration files in /etc/boundary.d. There you’ll see a certain tag specified in the demo code that can be used in your filters:
- The ingress worker filter is:
"ingress" in "/tags/type" - The egress worker filter is:
"egress" in "/tags/type"
You can see these in the Workers section:
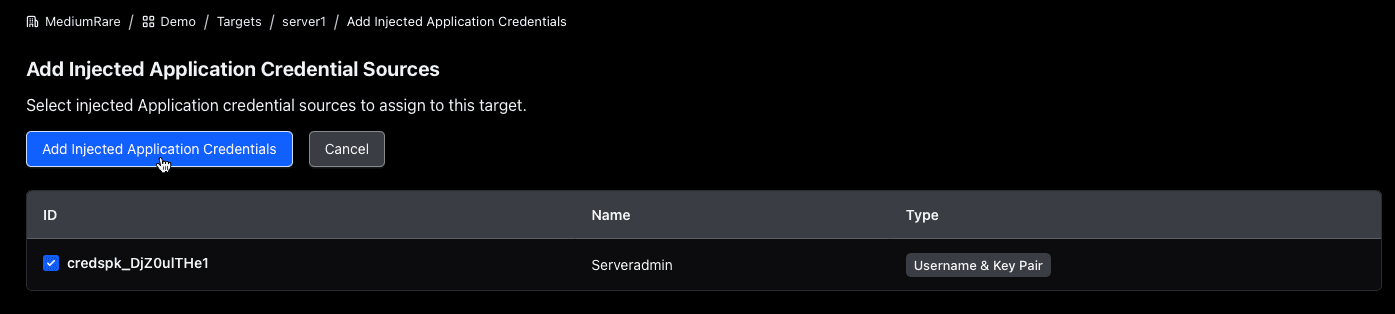
Click on “Save”. The target has now been successfully created. Next, inject the credentials created earlier in this session. Click on the “Injected Application Credentials” tab in the Target section:

From there, click “Add Injected Application Credentials” and check the box of the credential with the name “Serveradmin”. Then click on “Add Injected Application Credentials”.
»Use transparent sessions
The original way to connect to targets in Boundary is by typing boundary connect ssh -target-id <target_id> into the CLI or manually connecting through Boundary Desktop. Today, the most common method is transparent sessions.
This new abstraction removes the need for any user to have knowledge on how to use Boundary and lets users employ their own tools, such as a terminal with SSH, a browser with HTTP, or an RDP client to connect to a Windows host. It makes Boundary transparent to the user.
I think this portion of the tutorial is best explained through this demo video:
As you can see, the user needs only to authenticate to Boundary, and if authorized, the user can access the target through Boundary. As part of the session connection, Boundary will inject the credentials without requiring users to handle or see credentials, reducing the chances of an exposure or leak.
»Learn more about Boundary
In summary, this demo showed you how to:
- Set up HCP Boundary
- Create a testing environment
- Configure Boundary
- Use transparent sessions
Together, that lets you configure a complete remote access workflow that people who don’t know anything about Boundary can use.
If you want to learn more about Boundary, have a look at the HashiCorp Developer website on Boundary, which houses a ton of documentation and more tutorials.
Feel free to chat with me about this post or any other HashiCorp product on LinkedIn or over email.